Uc Browser

50 DoFollow Blogs to Increase your Page Rank


The webmasters are mostly busy to increase the page rank of their initial website. Guest Posting, blog commenting and forum posting is famous way to made some positive change on your blog page rank. May be you're always busy to comment on other's blog. All the blog may not be DoFollow. Comparatively, dofollow blog commenting is more effective than nofollow.

Considering this, I have collected the 50 blog of the popular bloggers. Main objective is to be In Touch with bloggers. I asked them weather the blog is dofollow or not. Of course it covered half of the time for blogging by asking 50 bloggers about their blog. I've choose only dofollow blogs and listed here as follow:


Work hardly and be busy commenting on the blogs which I have mentioned above. Surely, Google consider your hard work and provide some positive reward for you. It means you can get blog popularity and make money from it! All the people looks for Page Rank and nothing else. I've done all these work for your walefare and rest of the thins are up to you.

7 Ways to Secure your Computer from Online Threats while Surfing Internet

Now a days every one uses internet which makes your computer vulnerable to online threats. But taking proper precautions can save your computer from these online threats. So here are 7 ways to secure your computer from online threats while surfing internetways to secure computer from online threats

7 ways to secure your computer from online threats while surfing internet

1. Enable windows automatic updates feature

Windows automatic update make your computer updated to the new programming enhancements which reduce the security threats to your computer. You have to do nothing for updating and also it will not interrupt you. It is recommended to enable this feature to keep your computer secure online.

2. Install antivirus software

Installing a good antivirus software can help you a lot to protect you from online threats. I personally recommend you to ESET smart security antivirus. Whichever antivirus software you download, you should download it from its original website or some trusted websites like CNET.

3. Activate windows firewall

In addition to antivirus software you should also use windows firewall option to get maximum security. Windows built-in firewall protects your computer from viruses and worms so activate it to keep online threats away while surfing internet.

4. Enable pop up blocker of your browser

Whichever browser you use but don’t forget to enable pop up blocker option to secure your computer from threats. Mostly legit sites don’t use pop ups and mostly pop ups contain viruses. So be sure when a pop up even open even after enabling pop up option, don’t click any of the links this pop up contain and close it immediately.

5. Clean cookies and session data after using internet

Before leaving your computer after using internet never forget to clean cookies and session data because it contains all information regarding your usernames and password. So leaving it can be a threat for your account information’s.

6. Be aware from email spam

Now a days email spam is very common. A lot of spam emails contain links, be sure you never click on them. Because by clicking you inviting someone to get into your computer. So be aware of these kind of emails to save your computer from threats.

7. Be aware from phishing and internet frauds

Phishing and internet frauds are increasing now a days. You enter your sensitive information like passwords, username or credit card information on websites which look like original ones but they are not. So before entering sensitive data you should check whether website address is the original one or not.

How to Earn Money with PayPal Donate

Do you want to earn money with easy way? In this trick, we will use PayPal. Most of you sure know PayPal. PayPal is an e-commerce business allowing payments and money transfers to be made through the Internet. Online money transfers serve as electronic alternatives to traditional paper methods such as checks and money orders. So, how do we earn money from PayPal? We just add PayPal donate button in our blog. How? If you don't know, just follow the steps below

1. Go PayPal (If you don't have PayPal account, sign up first)
2. Click on the " Merchant Services" tab (see at the top of page)
3. Scroll down the window and click "Donations" in the right sidebar
4. Enter that first field,choose a button style,scroll down the window and click on "Create a button Now"
5. Then you will see HTML code, copy it
6. Log in to your blogger account
7. Go to Design>>>Page Elements>>>Add Gadget
8. Paste the HTML code from PayPal
9. Save it

Top 5 Paid to Review Websites


Do you know, what is Paid to Review (PTR). PTR is a kind of making money online. The rule is very easy, you only write an article based on the advertiser order, then the advertiser will measure your article and you will get money. Easy right? So, I think, Paid to Review is the best way to make money online. How not? Only by wrote on our blog that based advertisers order, we can get $5-$500 per post!

Usually PTR websites use PayPal. Why? Because, you can transfer your money to local bank easily. Actually, there are many PTR websites with different fee. So, I will share to you about, top 5 paid to review websites.

www.reviewme.com
www.blogsvertise.com
www.sponsoredreviews.com
www.adf.ly.com
www.infolinks.com

8 Ball Pool Online Flash game

How to submit site to google


Submit a sitemap to Google Webmaster Tools

Creating a sitemap helps search engines better crawl and categorize your site. You can easily create and verify a sitemap for any of your publicly viewable Google Sites through Google Webmaster Tools.

1. Verifying your site with Google Webmaster Tools

Before Google Sites will generate a sitemap, you must verify your site with Google Webmaster Tools:
  1. Sign in to Google Webmaster Tools new window using the same account information you use to sign in to Google Sites.
  2. Click "Add a site...", enter the base URL of your Google Site in the box that pops up, then click "Continue."
  3. On the following page, select the radio button next to Add a meta tag to your site's home page.
  4. Copy the meta tag (for example, <meta name="google-site-verification" content="z5mJLjVGtEe5qzCefW1pamxI7H46u19n4XnxEzgl1AU" />) from the Instructions box.
  5. In a new browser window or tab, navigate to the Google Site you wish to verify. (You will need to go back to the Webmaster Tools page, so do not close it.)
  6. Click the More actions button  and select Manage site.
  7. Select the General tab under the Site Setting area.
  8. Paste the meta tag that you copied on the Google Webmasters Tools site in the box next to Google Webmaster Tools verification.
  9. Click "Save changes."
  10. Go back to the Webmaster Tools page where you copied the meta tag.
  11. Click "Verify."

2. Submitting your Google Site's sitemap to Google Webmaster Tools

  1. On your Webmaster Tools home page, select your site.
  2. In the left sidebar, click Site configuration and then Sitemaps.
  3. Click the Add/Test Sitemap button in the top right.
  4. Enter /system/feeds/sitemap into the text box that appears.
  5. Click Submit Sitemap.

3. Locating your sitemap for later use

You can navigate to your sitemap by adding /system/feeds/sitemap to the end of the base URL of your Google Site.

How to Promote Your Site to Increase website Traffic

Seo Tutorials – How to Promote Your Site to Increase website Traffic

The major principle of SEO is to make your site visible to search engines, thus leading to higher rankings in search results pages, which in twist brings more traffic to your site. And having more visitors (and above all buyers) is eventually the goal in sites promotion. For truth’s sake, SEO is only one choice to promote your site and increase traffic – there are many other online and offline ways to do achieve the goal of getting high traffic and reaching your target audience. We are not going to discover them in this tutorial but just keep in mind that search engines are not the only way to get visitors to your site, even though they seem to be a preferable choice and a relatively easy way to do it.

1. Submitting Your Site to Search Engines, Search Directories, forums and special sites

submit_url_to_Search-EnginesAfter you have finished optimizing your new site, time comes to submit it to search engines. Normally, with search engines you don’t have to do anything special in order to get your site included in their indices – they will come and find you. Well, it cannot be said precisely when they will visit your site for the first time and at what periods they will visit it later but there is hardly anything that you can to do invite them. Sure, you can go to their Submit a Site pages in submit the URL of your new site but by doing this do not anticipate that they will get to you right away. What is more, even if you submit your URL, most search engines reserve the right to judge whether to crawl your site or not. Anyway, here are the URLs for submitting pages in the three major search engines: GoogleMSN, and Yahoo.
In addition to search engines, you may also want to have your site included in search directories as well. Although search directories also list sites that are applicable to a given topic, they are dissimilar from search engines in several features. First, search directories are usually maintained by humans and the sites in them are reviewed for relevancy after they have been submitted. Second, search directories do not use crawlers to get URLs, so you  need to go to them and submit your site but once you do this, you can stay there forever and no more efforts on your side are necessary. Some of the most popular search directories are DMOZ and Yahoo! (the directory, not the search engine itself) and here are the URLs of their submissions pages: DMOZ  and Yahoo!.
Sometimes posting a link to your site in the right forums or special sites can do wonders in terms of traffic. You need to find the forums and sites that are leaders in the fields of interest to you but generally even a simple search in Google or the other major search engines will retrieve their names. For occurrence, if you are a hardware freak, type “hardware forums” in the search box and in a second you will have a list of sites that are favorites to other hardware freaks. Then you need to check the sites one by one because some of them might not permit posting links to commercial sites. Posting into forums is more time-consuming than submitting to search engines but it could also be pretty rewarding.

2. Submitting Your Site to Specialized Search Engines

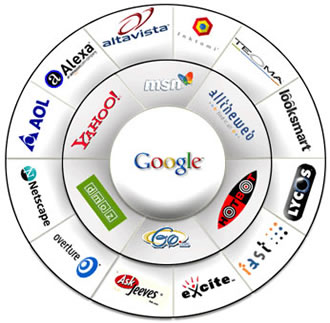
Submitting Your Site to Specialized Search EnginesGoogle, Yahoo!, and MSN are not the only search engines on Earth, nor even the only common-purpose ones. There are many other common-purpose and specialized search engines and some of them can be really helpful for reaching your target audience. You just can’t imagine for how many niches specialized search engines exist – from law, to radiostations, to educational one! Some of them are actually huge sites that gather Webwide resources on a particular topic but almost all of them have sections for submitting links to external sites of interest. So, after you find the specialized search engines in your niche, go to their site and submit your URL – this could prove more trafficworthy than striving to get to the top of Google.


3. Paid Ads and Submissions

paid-ads-submissionsWe have already mentioned some other alternatives to search engines – forums, specialized sites and search engines, search directories – but if you need to make sure that your site will be noticed, you can always option to paid ads and submissions. Yes, paid listings are a fast and guaranteed way to come into view in search results and most of the major search engines accept payment to put your URL in the Paid Links section for keywords of interest to you but you also must have in mind that users normally do not trust paid links as much as they do with the normal ones – in a sense it looks like you are bribing the search engine to place you where you can’t get on your own, so think twice about the pros and cons of paying to get listed.

How to Create a Website with Blogger

  1. If you don't have a person gmail account (must not be your education gmail, such as University of Minnesota gmail account), go ahead and create new gmail account now. It's important that you don't use your official education account as it doesn't have all the features that personal gmail accounts do.
    IMPORTANT: When you use your personal gmail account and your personal blog, you should use a different browser than the one that you use for your official education/university gmail, otherwise this causes problems. e.g. I use Firefox for my University of MN gmail, and Chrome for my personal gmail and personal blog.
  2. Once you have created a personal gmail account, link to the https://blogger.com/start website
  3. Click on the orange arrow that says "create your blog now."
  4. On the "Create a Google Account" screen enter in the information required, namely:
    1. Enter your personal gmail email address, which should be the one that you want to use to be paired with your blog that you are going to create [must not be your official education one. You'll have to retype your email address in the second box.
    2. Enter password (it's a good idea to write this down somewhere safe -- or email it to yourself and then save the email so you can refer to it later if you forget it). You have to retype the password in the second box.
    3. Enter a display name
    4. Choose a user name. If you prefer people not to know who you actually are, then choose a fictitious name. e.g. 2tech4me
    5. Accept the terms (it is safe to do and won't generate junk mail).
    6. Word verification: type the letters that appear as a graphic above the verification box. This is there to ensure that the blog is being created by a person and not automatically being generated by a computer.
    7. Click on the "Continue" arrow
  5. On the "Name your blog" screen:
    1. Enter title: This is the title that will appear at the top of your blog page and will also be the default name that will appear in users' browsers when they bookmark/add to favorites you blog, so choose something that will give readers a clear idea of what your blog is about
    2. Blog address: pick something that you'll remember easily and that is easy to type.
    3. Click on the "Continue" arrow
  6. On the "Choose a template" screen:
    1. Scroll through the selections and click on the little radio button next to the name of the template that you choose. e.g. I chose the snapshot template. Note: you can change the template later if you decide you don't like the one you have selected, so don't spend too much time at this point worrying what will look best!
    2. Click on the "Continue" arrow
  7. On the "Your blog has just been created!" screen:
    1. Click on the "Start Blogging" arrow
  8. A window will appear that looks much like a word processing window. Start typing, and use the formatting bar at the top to help you format your entry. e.g. You can change font size, type of font, color, justification, create links and so on. Experiment with these to see what they do.
    1. When finished, click on "Publish Post"
  9. Once you have posted an entry, a screen will appear telling you "Your blog post published successfully!"
    1. To see the results, click on the link to "View Blog."
  10. To get back to your blog so that you can add a new entry or edit the existing blog, click on the little orange "B" next to the search field at the top left of your browser window. If you are already logged in, this will take you to your blog Dashboard. If you aren't logged in, then you will first need to log in (using the user name and password that you set up when you created your blog -- that's why it's important to write down what these are when you first create your blog).
  11. From the dashboard you can:
  • create a new post (a new blog entry): click on the "NEW POST" button
  • change your blog settings (don't worry about this now, but do explore later)
  • edit your existing posts: to do this, click on "Edit Posts" --> this takes you to a screen that gives you the option of creating a new post or editing your entries. To edit entry, click on the "Edit" link next to the entry. This opens the blog in editing mode, and you can go ahead and edit
  • to post blog once you are done editing, click on the orange "Publish Post" button (which takes you to "Your blog post published successfully!" window, and from there, click to "View Blog").

Posting a photo or other image on your blog

  1. When you are in the compose window to create a blog, you will see a little picture/icon that looks like a mountain on the tool bar (right next to the spell check icon). Click on that
  2. This opens a box that gives you a choice to add an image from your computer or an image from the web. The easiest is from your computer. So click on the button that says "browse."
  3. Navigate to where you have a picture saved on your computer and select it.
  4. Back in the upload image window, select the layout (if you want the picture to be left, center, or right, or none). I like the option of having the text wrap around the picture as it reduces scrolling -- but this is a personal choice -- no "right" way!. Also select if you want the image to be small, medium or large. My advice: go small or medium, but avoid large as it makes the blog take too long to load.
  5. Click the "Upload Image" button. It will take a little while for it to load, but that should do it! (you may need to refresh the page for you to see that the image has been uploaded).

Signing in once you have your blog set up

When you want to blog again on another day, just go to blogger.com --> at the top of the page that opens, you will see "Sign in to use Blogger with your Google Account."
  • Fill in your username and password (that you created in step 3 above).
  • Click "Sign In"

Posting comments on other people's blogs

To post a comment on a blog:
  1. Once you are on a person's blog, click on the "Post a Comment" link that usually appears below their blog entry.
  2. This will open a comment in the box. It's useful to click on the link next to this that says, "show original post" as it enables you to see what the person wrote in their blog as you are composing your comment on this.
  3. Click in the comment box and type your comments.
  4. Enter your blogger.com user name and password below the comment box, and then click on the blue "login and publish" button (Reason: In order to post a comment on a blogger.com blog, you need to have your own blogger account). If you are already logged in, then all you need to do is click on the "Publish Your Comment" button.

How to backup android phone

how to backup android phone

Data is very important for me, not just for me but i think for every one. Now a days many people have their important data in their phones. Some have their memorable pictures and some have important contacts and sms . Do you want to lose them? Your answer will be “NO”. But what if you lose your mobile or it may break or either you have to reset it or want to sell your mobile. Your all data will be gone in these situations. So you want to know how to save your data. Backup is the answer for this question. People who are using android let me tell you how to backup android phone. So you may not lose you important information and data.

Backup android phone using Google cloud

how to backup your android using google cloud1. Go to home screen of your mobile and select ‘menu’.
2. Now go in settings of your android phone.
3. In settings backup option will be in ‘accounts’ or ‘privacy’ option, go there. Different companies mobiles have this option in different settings option so you can check search it for yours.
4. In ‘accounts’ option you will find ‘backup and reset’ option’ click on it.
5. Now here you see three backup options ‘back up my data’, ‘backup account’ and ‘automatic restore’. Make sure that first and third is already checked. For more safety check ‘backup account’ so your data can be saved in Google cloud.
6. After checking this option it ask you about selecting account for backup. You can use existing account or can add another account. And now your data is safe.

Backup android phone using SD card

android backup using SD cardSD card is also a good option to back up your data and its very easy to do. Here are few simple steps you have to take to backup your android phone this way.
1. Insert SD card in your mobile.
2. Copy all your data in SD card.
3. Take out SD card from your mobile so your SD card do not lose or reset with mobile.
4. Now put this card in a safe place or copy its data in your computer.
5. You can do this process when you feel that your phone data is much updated after last backup. Or you can back up by this way once a week or a month according to your requirements.

How to Increase Internet Speed on Android Phone or Tablet


Everyone who uses internet on theirandroid phones or tablet want to knowhow to increase internet speed. Now in the era of technology mostly people use internet on their phones and many of them have android devices. From student to businessman, internet become need of everyone. And its really frustrating when your webpage do not load when you need it. Mostly this kind of situations occur due to low signal strength or due to low internet connection speed provided by your service provider. But you can increase internet speed on your android phone by using the tips we tell you and installing some applications we are going to mention here.

How to increase internet speed on android phone or tablet


  1.  Browser selection

    Opera mini is fastest browser for android phones. I personally use this browser on my android devices and it really download data faster while on the other end Firefox and Chrome are tortoise on android phones. So for better internet speeduse Opera mini for internet surfing on android phones.
  2. Clear cache of your android phone or tablet

    When cache memory is full then it slows down your android device which in return slows down internet speed. So clearing cache memory regularly can do the trick for you and can increase internet speed on android phone.
  3. Choose loading maximum data option

    In wireless and network settings of your android phone you find GPRS transfer prefer. There you have to select data prefer instead of call prefer. This will have a positive impact on internet speed.
  4. Closing and deleting of unnecessary apps

    Running unnecessary apps uses android processor and a lot of burden on processor reduces internet speed. So close all unnecessary apps before using internet and its better to delete apps which you are not going to use in future.
  5. Switch to 3G network

    As you all know that 3G is technology whose data rate is far greater than th 2G mobile technology. So switching to 3G technology can boost internet speed on android. For this you just have to change some settings of your android phone. So just go to wireless and network settings of your android and look for mobile network option in which you have to select 3G option. And after that you feel it enhances internet speed many times than when you are using 2G.
  6. Android Applications to increase internet speed

    Internet speed master is a free android app that can increase internet speed on your phone or tablet. The advantage of this app is it not only work with rooted android phones but also with non rooted devices. I personally use this app and find it the best internet speed enhancing app. If you don’t like this app or it don’t work for you then other applications i recommend you are Network speed booster and Android speed booster to increase internet speed on your android devices. These apps can increase internet speed by 20-30% so i suggest you to use one of these apps.